Point Cloud to Revit conversion is a transformative process for architects, engineers, and construction professionals. It enables accurate documentation of as-built environments, streamlines renovation projects, and enhances precision in building information modeling (BIM). Whether you’re an experienced professional or just starting, a systematic approach is crucial for achieving high-quality results.
This blog outlines the ultimate checklist for seamless Point Cloud to Revit conversion, ensuring you maximize efficiency while maintaining accuracy.
What is Point Cloud to Revit Conversion?
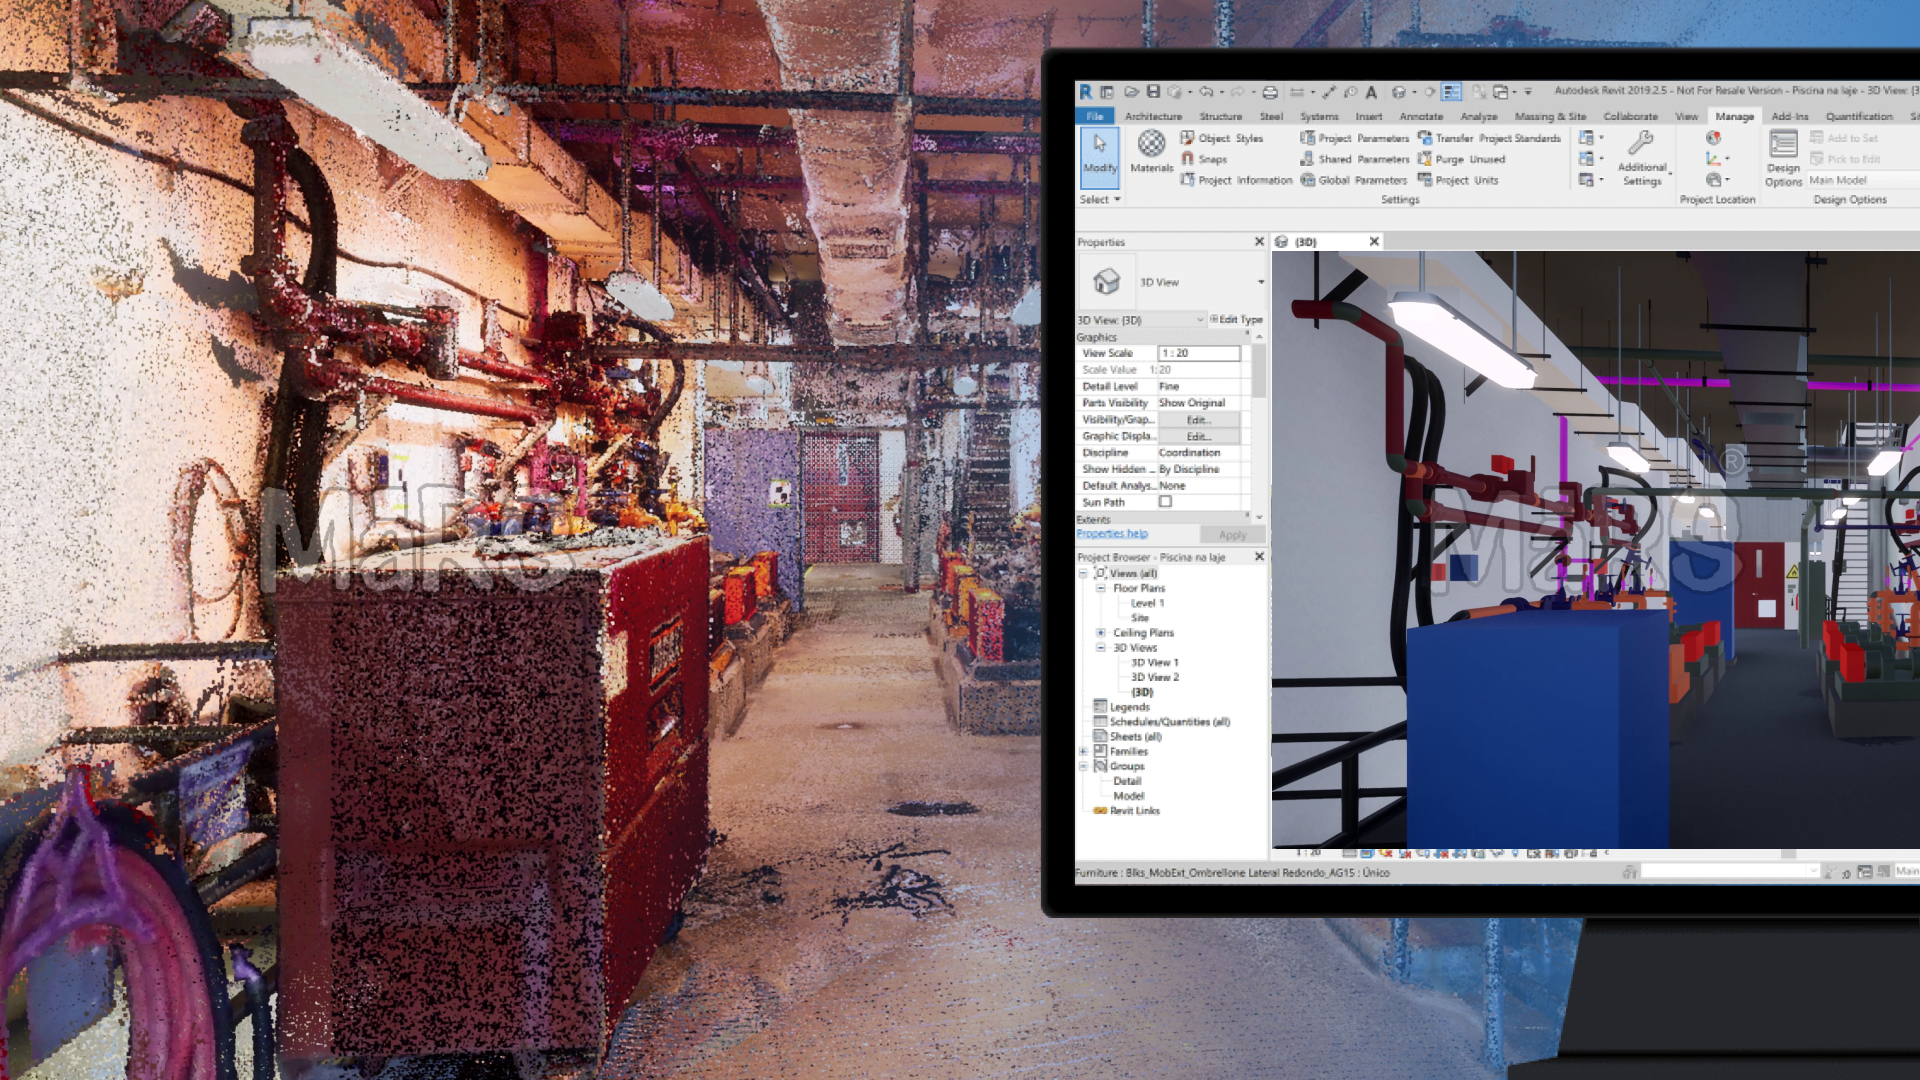
Point cloud data is a collection of millions of points captured by 3D laser scanning or photogrammetry. These points represent the surface geometry of objects or structures. Revit, a popular BIM software, allows these scanned datasets to be converted into 3D models for further architectural or structural detailing.
Why is a Checklist Important?
The Point Cloud to Revit workflow is a multi-faceted process that requires careful planning, technical precision, and seamless coordination between teams. A well-structured checklist acts as a roadmap, guiding professionals through each step to ensure nothing is overlooked. Let’s dive into the key reasons why a checklist is essential:
- Efficient management of data.
- Error-free conversion.
- Cost and time savings.
- Better collaboration across project stakeholders.
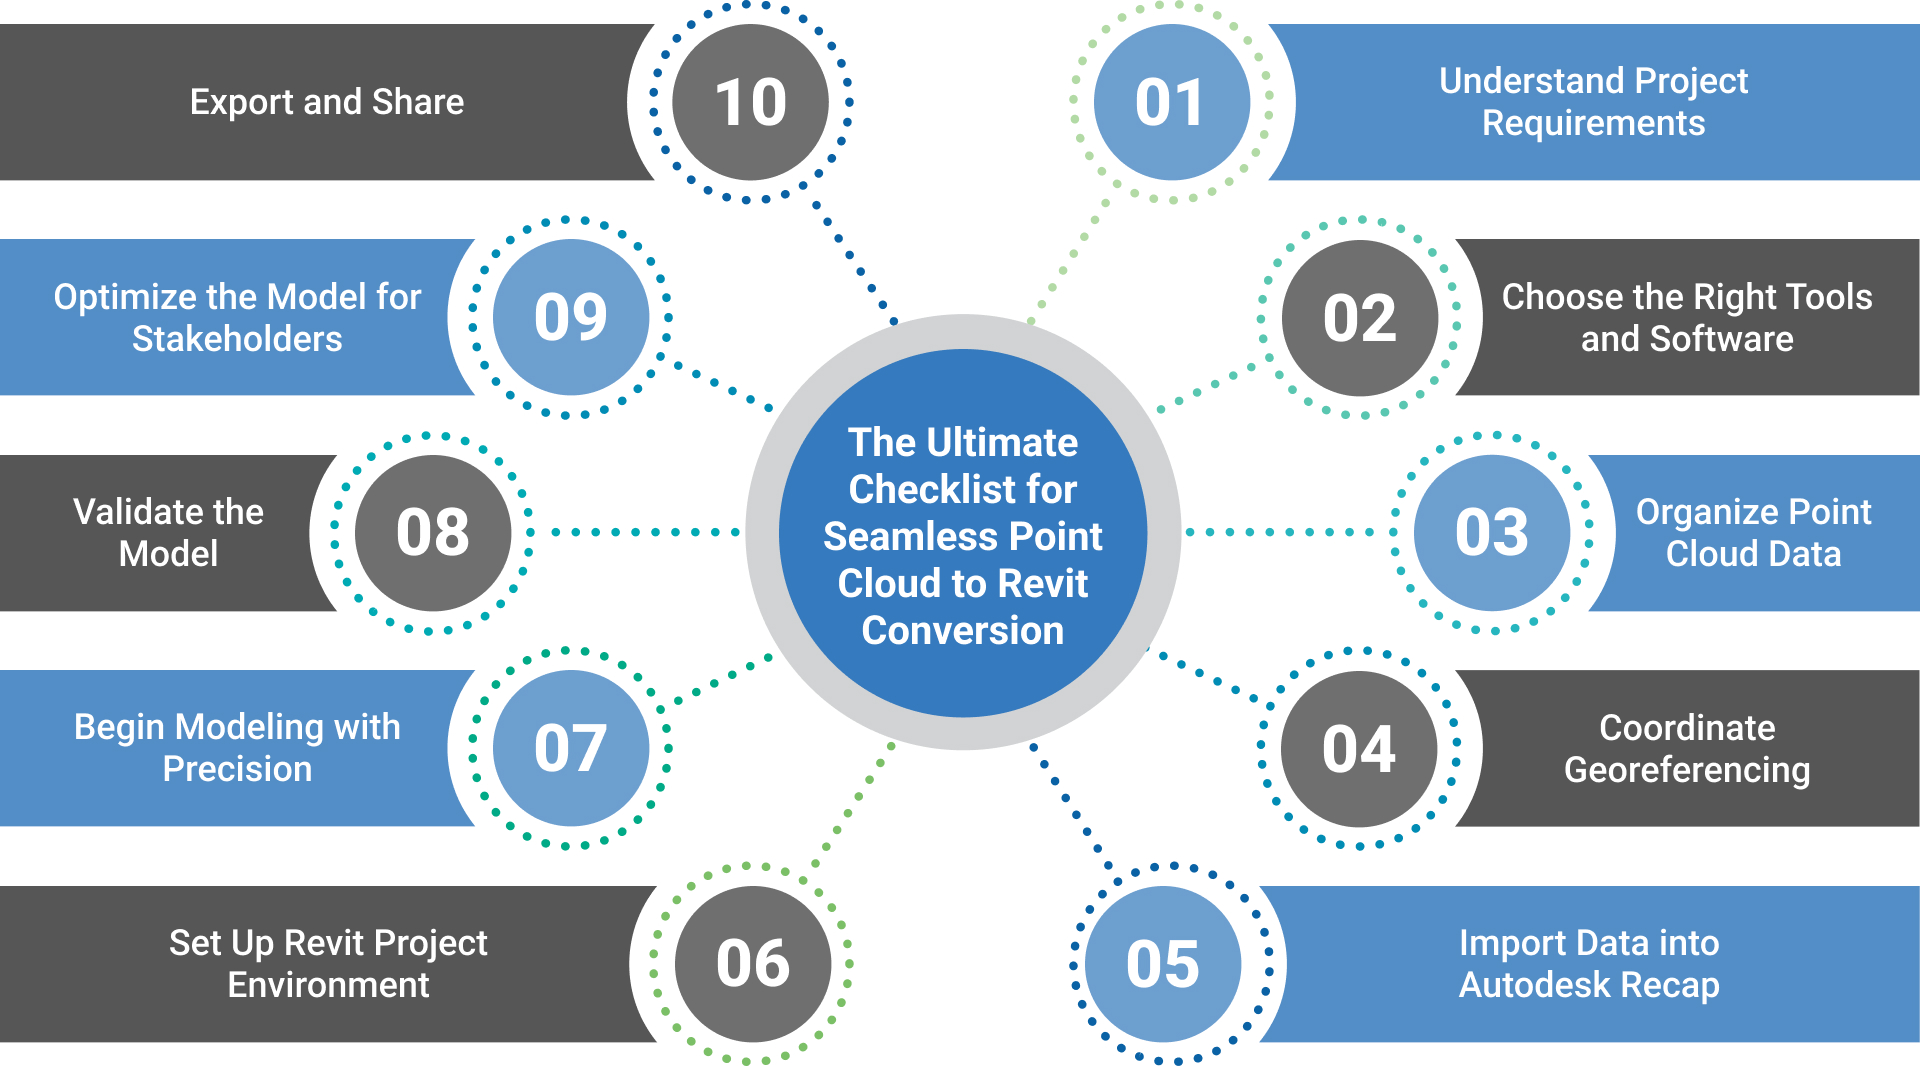
The Ultimate Checklist for Seamless Point Cloud to Revit Conversion

1. Understand Project Requirements
Clearly defining the project’s objectives before starting the Point Cloud to Revit conversion. This includes identifying whether the project is for renovation, heritage preservation, or new construction. Understanding the level of detail (LOD) required for the final model is critical, as it determines the precision needed in modeling. Additionally, the end use of the Revit model—whether for design, analysis, or construction—should guide the approach and focus of the process.
2. Choose the Right Tools and Software
Selecting reliable tools for scanning and modeling ensures smoother workflows. 3D laser scanners such as Leica or Faro provide high-quality Point Cloud data, while software like Autodesk Recap and Revit streamlines processing and modeling. Ensuring compatibility between tools and software versions is crucial to prevent errors and maintain efficiency.
3. Organize Point Cloud Data
Point Cloud data must be systematically processed and organized before being imported into Revit. This involves cleaning the dataset to eliminate noise or irrelevant data points and categorizing sections based on structural elements like walls, floors, and roofs. Organized data reduces clutter and simplifies the modeling process.
4. Coordinate Georeferencing
Proper georeferencing aligns the Point Cloud data with real-world coordinates, ensuring the model is geographically accurate. This step requires careful attention to units, coordinate systems, and alignment standards to maintain consistency across datasets. Georeferencing is critical for projects that involve multiple Point Cloud files or collaborations across different teams.
5. Import Data into Autodesk Recap
Autodesk Recap acts as a bridge between raw Point Cloud data and Revit. The data is first imported into Recap for processing, where it is refined, scaled, and adjusted for orientation. They are exporting the processed file in a format compatible with Revit.RCP or .RCS ensures smooth integration with the BIM software.
6. Set Up Revit Project Environment
Before linking the Point Cloud file, the Revit environment must be configured to suit project needs. This includes setting project units, templates, and levels corresponding to the modeled structure. Establishing a proper project environment helps accurately place and scale the Point Cloud data within Revit.
7. Begin Modeling with Precision
Using the Point Cloud data as a reference, modeling begins by tracing the geometry of structural elements. Walls, floors, ceilings, and other features are recreated within Revit by following the contours and alignments of the Point Cloud. Attention to detail is critical at this stage to ensure that the model accurately reflects the scanned structure.
8. Validate the Model
Validation is essential to ensure that the Revit model accurately corresponds to the Point Cloud data. This step involves comparing the model against the original Point Cloud and performing clash detection to identify and resolve any inconsistencies. Validation enhances the reliability and usability of the final model for stakeholders.
9. Optimize the Model for Stakeholders
Once the model is complete, it should be optimized for its intended use. This may involve simplifying the model by removing extraneous details or refining it to meet specific stakeholder requirements. An optimized model is easier to work with and integrates seamlessly into construction planning or quantity estimation workflows.
10. Export and Share
The final step involves exporting the Revit model in formats that align with project requirements.RVT or IFC. The model should be stored securely and shared with collaborators for review or further use. Proper documentation of the modeling process and data ensures continuity and traceability for future updates.
By following these detailed steps, professionals can achieve a streamlined, efficient, and accurate Point Cloud to Revit conversion process, laying the foundation for successful project execution.
Benefits of a Well-Executed Point Cloud to Revit Conversion
- Enhanced Accuracy: Eliminates manual errors by using precise laser-scanned data.
- Time Savings: Streamlines workflows, reducing modeling time.
- Collaboration: Improves coordination between architects, engineers, and contractors.
- Sustainability: Facilitates retrofitting and adaptive reuse of existing structures.
Conclusion
Point Cloud to Revit conversion is critical in modern construction and design workflows. By following a structured checklist, professionals can ensure a smooth, efficient process that delivers high-quality BIM models. From understanding project requirements to validating the final model, every step adds to the project’s overall success. Master this workflow, and you’ll unlock architectural precision and innovation possibilities.


Recent Comments